Solenoid Valve Selection, Operation, and Troubleshooting in Process Plants
A field engineer's guide to solenoid valve types, coil specifications, wiring standards, and systematic fault diagnosis in industrial automation systems
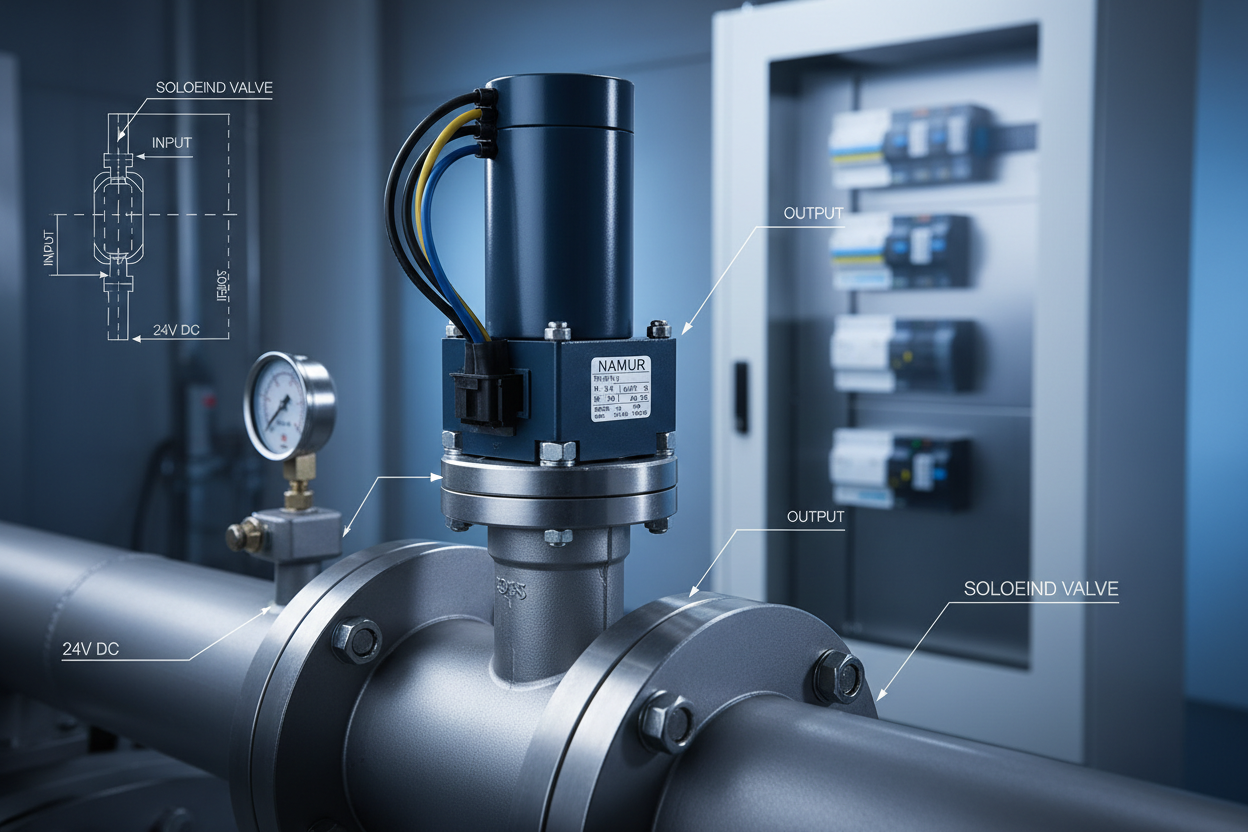
What Is a Solenoid Valve and How Does It Work
A solenoid valve is an electromechanically operated valve. It converts electrical energy into linear mechanical motion to open or close a flow path. The solenoid coil generates a magnetic field when energized. That field pulls a ferromagnetic plunger against spring force, shifting the valve seat. When de-energized, the spring returns the plunger to its rest position.
Two primary configurations exist in process plants. First, a 2-way valve controls a single flow path — it is either open or closed. Second, a 3-way valve diverts flow between two ports, commonly used to actuate pneumatic cylinder actuators on control valves or on-off valves.
The fail-safe position is a critical selection parameter. A normally closed (NC) valve stays shut when the coil loses power. A normally open (NO) valve stays open on power loss. Engineers must align the fail-safe position with the required process safety state defined in the Safety Instrumented Function (SIF) documentation.
Key Selection Parameters and Industry Standards
Selecting the wrong solenoid valve causes premature coil burnout, water hammer, or process leaks. Engineers must evaluate five core parameters before ordering.
1. Orifice Size and Cv Value — The flow coefficient Cv determines how much flow passes at a given pressure differential. Undersized orifices restrict flow and cause excessive pressure drop. Oversized orifices create high-velocity erosion on the seat.
2. Pressure Rating — The valve must handle both working pressure and maximum allowable working pressure (MAWP). Pressure-assisted models use line pressure to help close the valve, but they require a minimum differential pressure to open. Pilot-operated types need at least 0.5 bar minimum differential to function reliably.
3. Coil Voltage and Power Class — Most industrial solenoids operate on 24 V DC, 110 V AC, or 220 V AC. The coil watt-rating determines how hot the coil runs continuously. A Class H (180°C) insulation coil handles higher ambient temperatures than a Class F (155°C) coil. Always match coil voltage to the DCS output card specification.
4. Body Material and Seal Compatibility — Brass bodies suit water and pneumatic service. Stainless steel is mandatory for corrosive chemicals, food-grade, or high-purity applications. NBR seals work with petroleum-based fluids. PTFE or EPDM seals are required for aggressive acids or solvents.
5. Protection Rating — Field-mounted coils must carry at minimum an IP65 rating. Hazardous area installations require ATEX or IECEx certification with proper explosion protection category (e.g., Ex d IIC T4 Gb).
The NAMUR interface standard (EN 60947-5-6) is widely used for intrinsically safe solenoid driver circuits. Schneider Electric and Phoenix Contact both supply NAMUR-compatible solenoid driver modules for DCS marshalling cabinets. NAMUR signals operate at 8 V DC with 8 mA nominal current, providing inherent short-circuit and open-circuit detection.
Installation Best Practices and Wiring Guidelines
Correct installation prevents the majority of early failures. Follow these steps during commissioning.
Step 1: Orientation — Most solenoid valves must be installed with the coil facing upward or horizontal. Installing with the coil facing downward traps condensate in the coil housing and accelerates insulation breakdown. Check the manufacturer's installation datasheet for approved mounting positions.
Step 2: Piping Cleanliness — Flush the pipeline before connecting the solenoid valve. Particulate contamination on the seat causes internal leakage or fails the valve in the open position. Install a 40-mesh upstream strainer for pilot-operated types.
Step 3: Electrical Wiring — Use shielded cable for solenoid wiring runs exceeding 30 meters. Ground the cable shield at the control cabinet end only. Add a flyback protection diode (1N4007 or equivalent) across the coil terminals when driving DC solenoids from transistor output cards. Without the diode, inductive kickback can damage the output card or create EMI interference with nearby instruments.
Step 4: Functional Test — Before loop handover, cycle the valve manually using the coil manual override button to confirm free mechanical movement. Then perform an electrical functional test: energize from the DCS output, measure coil current, and verify position feedback to the DCS input card. Typical coil resistance for a 24 V DC coil is 20–80 Ω at 20°C ambient.
Phoenix Contact's PLC interface modules include integrated solenoid driver outputs with diagnostics. These modules detect open-circuit coil failures and report them directly to the controller without additional wiring.
Systematic Troubleshooting Procedure
Solenoid valve faults fall into three categories: electrical, mechanical, and process-side. A systematic approach saves diagnostic time in the field.
Symptom: Valve does not open when energized
Step 1 — Measure supply voltage at the coil terminals with a calibrated multimeter. Voltage below 85% of nominal (e.g., below 20.4 V for a 24 V coil) is insufficient to lift the plunger reliably. Check for voltage drop across long cable runs or loose terminal connections.
Step 2 — Measure coil resistance. An open circuit (infinite resistance) indicates a burnt coil. A short circuit (near zero resistance) indicates coil insulation failure. Replace the coil assembly. Most industrial solenoids have field-replaceable coils without removing the valve body from the pipe.
Step 3 — If voltage and coil resistance are correct, check for mechanical jam. Press the manual override pin. If the valve responds to the override but not to electrical signal, the issue is in the control circuit — check the DCS output card, wiring continuity, and interlock logic.
Step 4 — If the override also fails to move the plunger, the valve body is mechanically stuck. Debris on the seat or corrosion in the plunger bore is the likely cause. Remove the valve for bench cleaning.
Symptom: Valve chatters or does not hold position
Chattering is caused by AC ripple on a DC supply, insufficient coil voltage, or excessive back-pressure. For AC solenoids, a damaged shading ring on the stator face causes 50/60 Hz vibration. Replace the stator assembly.
Symptom: Valve leaks when closed
First confirm the valve is fully de-energized. Then check seat condition. Hard-seat metal-to-metal solenoid valves require higher differential pressure to seal. Soft-seat elastomeric designs seal at low pressure but degrade with certain chemicals. Replace the seat and seal kit if leakage exceeds the manufacturer's specified leakage class.
Bachmann's M1 modular controller platform logs discrete output switching events with millisecond timestamps. When a solenoid valve fault occurs in a Bachmann-controlled skid, engineers can replay the output event log to determine whether the coil received its energize command or whether the fault originated upstream in the logic.
Conclusion and Action Advice
Solenoid valves are simple in concept but demand careful attention during selection, installation, and maintenance. Coil voltage matching, seal material compatibility, and fail-safe position definition are the three parameters that most frequently drive field failures when overlooked. Use the NAMUR interface standard wherever intrinsic safety is required. Install flyback diodes on all DC coil circuits. When faults occur, follow the structured three-step electrical-mechanical-process diagnostic path rather than replacing the entire valve assembly immediately. Most solenoid coil failures are field-repairable in under 20 minutes. Documenting coil resistance baselines at commissioning provides a reliable reference for future condition-based maintenance decisions.


